Have you seen those viral AI-style Instagram reels where, for example, Prime Minister Modi is seen hugging people as he steps out of a car? Such videos are trending like wildfire! In this guide, I’ll show you how to create and edit these kinds of viral reels using CapCut, all from your mobile phone.
Let’s dive into a step-by-step tutorial to help you make high-quality Instagram reels that can go viral.
What You Need Before You Start
-
CapCut App Installed
If you haven’t already installed CapCut, you can find it on the Google Play Store or Apple App Store. -
VPN Connection
Sometimes, CapCut features might be limited in certain regions. To unlock full access, connect to a VPN. You can use any reliable free VPN app from the Play Store such as Turbo VPN. -
Your Raw Video Footage
You’ll need your original video clip that you want to edit.
Step 1: Set Up CapCut and Import Your Video
-
Open CapCut and tap on “New Project.”
-
Select the video you want to edit.
-
If you can’t find your video, go to your device Album and locate the folder directly.
-
Once selected, tap “Add.”
🎯 Pro Tip: Make sure to mute the original video by selecting the video and tapping the Mute icon.
Step 2: Add Trending Music to Your Reel
-
Tap on “Audio” → “Sounds” → “Device.”
-
Import trending music or use “Extract Audio from Video” if you’ve saved a popular reel.
This is crucial — syncing your video with viral audio trends increases your chance of discoverability on Instagram.
Step 3: Beat Marking for Sync
-
Click on your music track and tap “Beats.”
-
Play the audio and manually tap Add Beat at every drop or transition point in the music.
This will help you align your video effects with the beat — a key tactic for making engaging reels.
Step 4: Add Slow Motion with Curve Speed
-
Tap on the video clip → “Speed” → “Curve” → “Custom.”
-
Drag points down to create slow-motion segments.
-
Add extra beat points if needed for precise control.
Avoid selecting “Better Quality” at this stage, as it can lag during editing.
Step 5: Split Your Video at Each Beat Point
-
Zoom into the timeline.
-
At each beat marker, tap on the clip and hit “Split.”
This helps you apply effects exactly where they make the most impact.
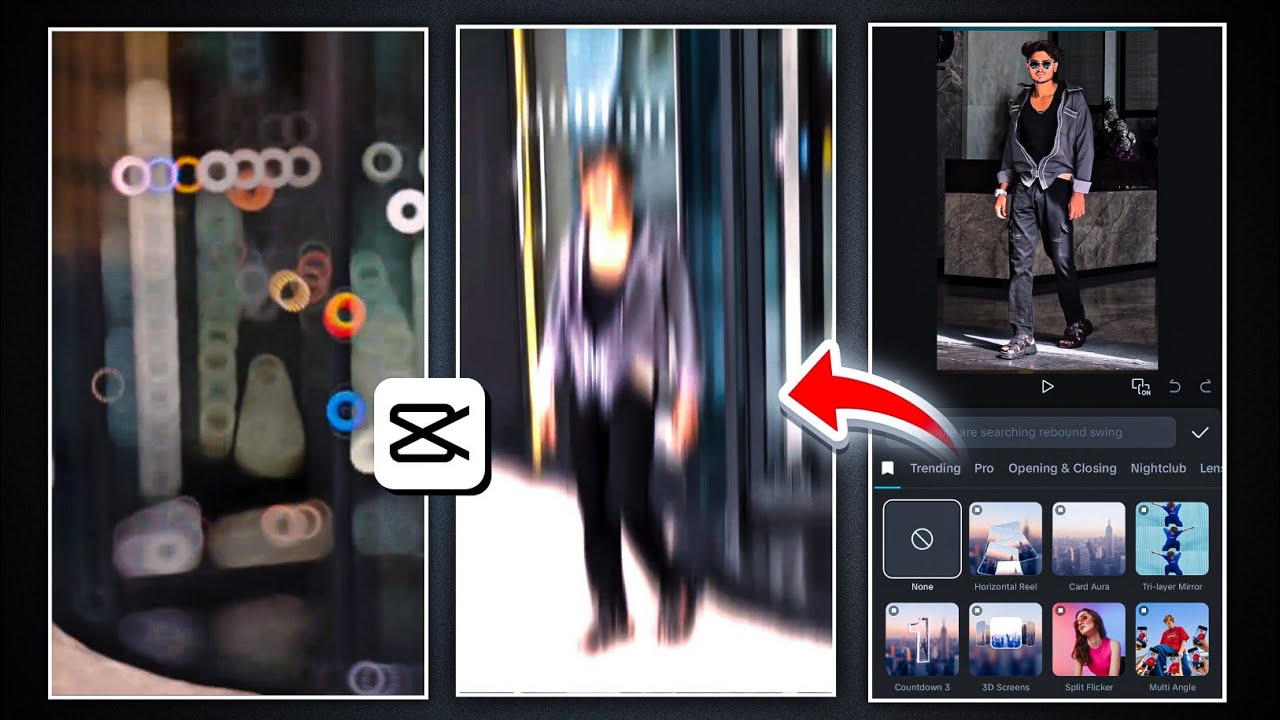
Step 6: Add Visual Effects and Animations
There are 3 major ways to add effects:
1. Clip Animations
-
Tap on a clip → “Animation” → “In” or “Out.”
-
Use trending effects like “Unfold”, “Fade Out”, or “Padding.”
2. Transitions Between Clips
-
Tap the white box between clips → “Transition.”
-
Use transitions like “Shake,” “Zoom,” or “Vertical Blur.”
3. Global Effects
-
Go to “Effects” → “Video Effects.”
-
Popular choices include:
-
Hello Blur from Opening & Closing
-
Night Club Effects
-
Trending body effects like Pulse or Shake.
-
Explore More Instagram Reel Effects
Step 7: Add a Blackout Segment for Trendy Impact
-
Split your video at the desired location.
-
Apply a “Fade Out” animation with a duration of 0.6 seconds.
-
Insert a blank black clip and extend it to match the beat length.
-
Use transitions and animations for re-entry.
Step 8: Apply Color Grading for a Professional Look
-
Choose a Filter
Go to “Adjust” → “Filter” and select a theme like Orange & Blue. -
Manual Adjustments
-
Brightness & Contrast: Enhance visibility.
-
Saturation: Make colors pop.
-
HSL Settings: Target specific colors like greens or skin tones.
-
Temperature & Shadows: Create a warm or cool look.
-
Vignette: Add a cinematic black border.
-
Sharpening & Clarity: Improve video quality.
-
Step 9: Export the Final Video
-
Before exporting, revisit “Speed → Curve” and apply “Better Quality” to smooth out slow-motion segments.
-
Then hit Export and set your resolution to max.
Now your video is ready to upload to Instagram Reels!
Final Thoughts
Creating viral reels isn’t just about luck — it’s about timing, editing precision, and syncing with trends. With CapCut and the right audio, effects, and color grading, you can create high-quality Instagram reels that stand out.
📢 If you want to explore more free tools for content creation, check out:
🎨 Love Photo Editing & AI Prompts?
Join our WhatsApp Channel to get the latest AI art prompts, editing tips, and exclusive resources!
👉 Join Now on WhatsApp